Once I saw these apps popping up, I thought portrait photographers are done.
The promise is straightforward:
- Train AI model on photos of yourself.
- Generate thousands of quality pictures without ever having to attend a photoshoot.
So that’s what I did. $29 for a bunch of portrait pictures seemed low enough to try.
TL;DR:
- The goal was to improve my existing profile picture
- Found a way to objectively measure it
- Put together a hypothesis of areas to improve
- Trained AI on photos of myself and generated pictures
- Scored them in an objective way and found out I failed
- Gave it another try
- Ended up with some wisdom and ridiculousness, scroll to the end
How do I measure this?
I started off with a simple and specific goal in mind – get a new and better LinkedIn profile picture at the end of this experiment.
That’s where the 1st hurdle pops up. How am I going to know if it’s better?
Luckily, there’s a tool called Photofeeler. It puts your picture out there for other people to rate on a set of criteria.
For business photos these criteria are:
- Competence (C)
- Likeability (L)
- Influence (IN).
There’s also a text field to add a job role.
I tried to be as plain as possible in this regard to reduce its influence on the photo’s perception and entered Marketing Manager as the role.
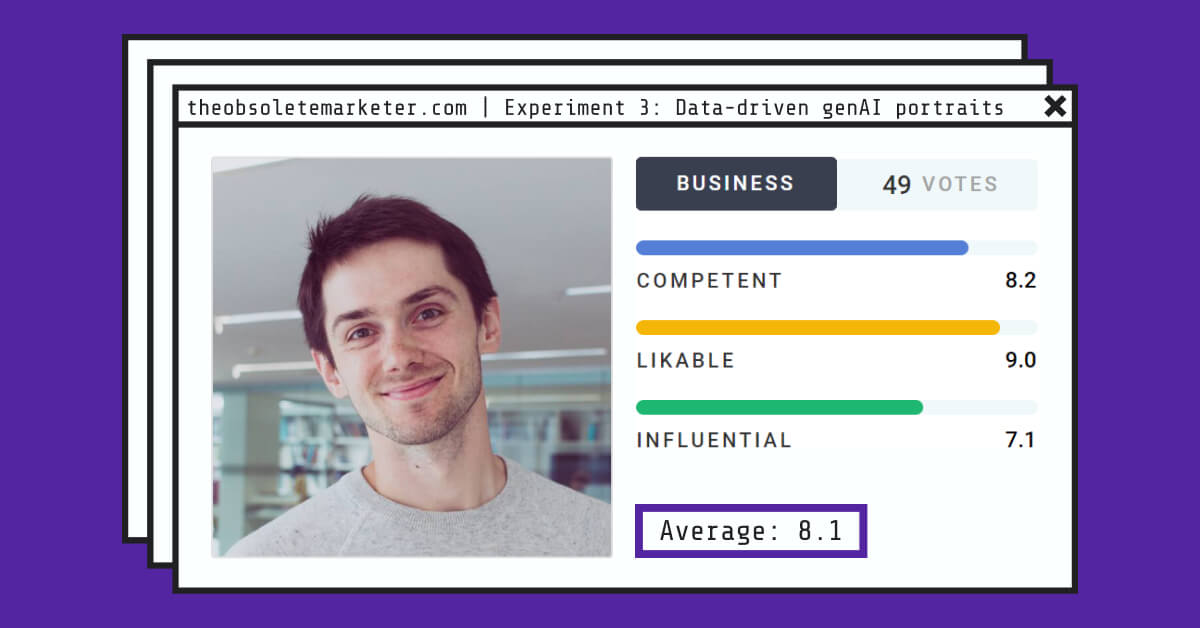
As you see, my baseline score was already decent at:
- Competence 8.2
- Likeability 9.0
- Influence 7.1
This made it a way harder for the entire experiment to be a success since merely changing something and getting an improvement of the overall rating is unlikely. Therefore, I decided to start with a hypothesis.
The hypothesis
Since my likeability (L) was already high, competence (C) decent, and influence (IN) the lowest of three, but still over 7, the goal is to improve influence and / or competence without lowering likeability.
- To not lose L, I should look positive and approachable as I am in the photo.
- To gain C, I should be in a “smart” environment or be doing something smart
- To gain IN, a formal attire or being on stage in a conference should help
The latter might positively impact my perceived competence as well.
Therefore, I decided to go with 3 types of pictures for the initial test and see if I can up my metrics:
- More formal attire in big city background
- Casual attire in a bookstore or similar “smart” place
- Casual attire, speaking on stage
There are other aspects of perceived influence and competence like the photo’s angle, whether you’re wearing glasses, perceived age, and other that I won’t be specifically testing.
Time to clone myself in AI-generated portraits
We’re not yet at the point where you can enter your name and get a decent picture of yourself unless you’re a well known public figure.
Tool choice
I didn’t obsess with researching absolutely everything that’s out there and basically chose between 3 tools:
In the end I went with photoai.com mostly due to the fact that the monthly price includes the training of 5 models and it otherwise didn’t seem better than PhotoShed. This foresight turned out useful as better quality results only started coming in with the 3rd model of myself that I trained.
Nuances of training your AI model for portrait photos
Training it is not exactly straightforward even if it’s reduced to uploading your photos and clicking train.
There are a couple of things to keep in mind when selecting your pictures for training:
- Is your face properly visible?
- Variety of angles
- Resolution
- Variety of shot framing
Anyone looking to replicate this approach should start by:
- Reading the documentation / tutorial of the chosen tool
- Finding a sufficient number of photos of oneself to train the model on
- If number 2 is an issue – take a couple of varied angle photos against a flat background
And only then continue to get a subscription.
For training your model in Photo AI, there is a bunch of photo selection tips in the documentation.
Generating usable pictures of “yourself” using AI
Once your model finishes training (a couple of hours), you can start generating pictures that look just like you.
Well, hopefully at least some of them will
If you’re also using Photo AI, I’ve found it best to start with one or more of the Shoots and move from there.
The process looks something like this:
- Generate pictures using a Shoot
- See if any of the generated pics look good
- Select the “Use prompt” option on the generated picture
- Tune the prompt to introduce fine changes
- Generate again
This will also give you an idea of what the tool expects in terms of details in the prompt so you will later be able to write a pretty good one on your own.
Going the other way around, you will most likely end up spending more time and generation credits to learn. But if you still want to go that route, check documentation of the tool you’re planning to use.
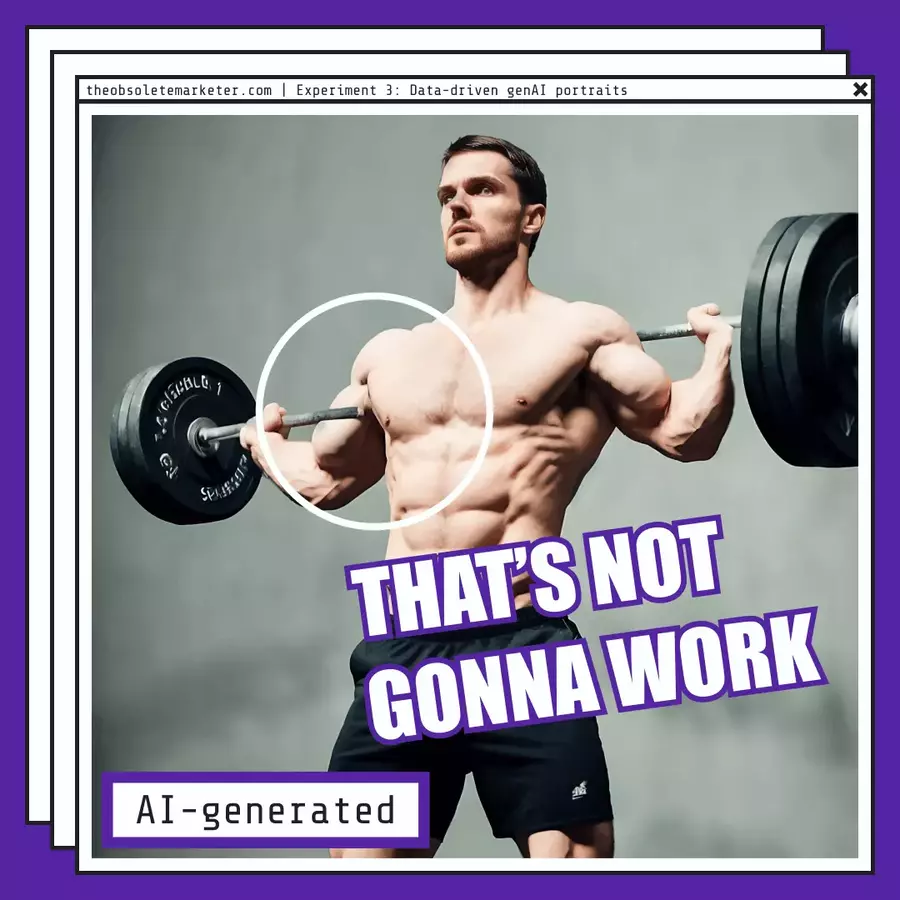
Most common genAI portrait quirks I encountered
If you’re considering the approach, here are some of the most annoying quirks I’ve noticed with Photo AI – the tool I used.
- Eye color. It’s always blue, da-bu-di da-bu-da, despite me selecting brown for the model I trained. Note: apparently the issue is being worked on, maybe even fixed by now.
- Cross-eyedness. Another eye issue is they’re often looking in different directions. Last time I looked into mirror, I didn’t have this in real life.
- Offset nose. In some of the angles it looked as if I had a broken nose at some point in the past.
- Double or even triple laryngeal prominence (Adam’s apple).
On the other hand, the tool does reasonably well with hands and fingers, often the Achille’s heel of AI picture generators.
Testing the AI-generated portraits
During my monthly subscription of Photo AI, I ended up generating nearly 900 pictures and in the end arrived at 3 new pictures that I tested with photofeeler as alternatives to the one I currently use.
But first, a surprising discovery
To be sure, I also tested a commonly used photo edit for LinkedIn photos – flat colored background behind the portrait.
It flopped spectacularly.

I changed my photo to one with original background the same day.
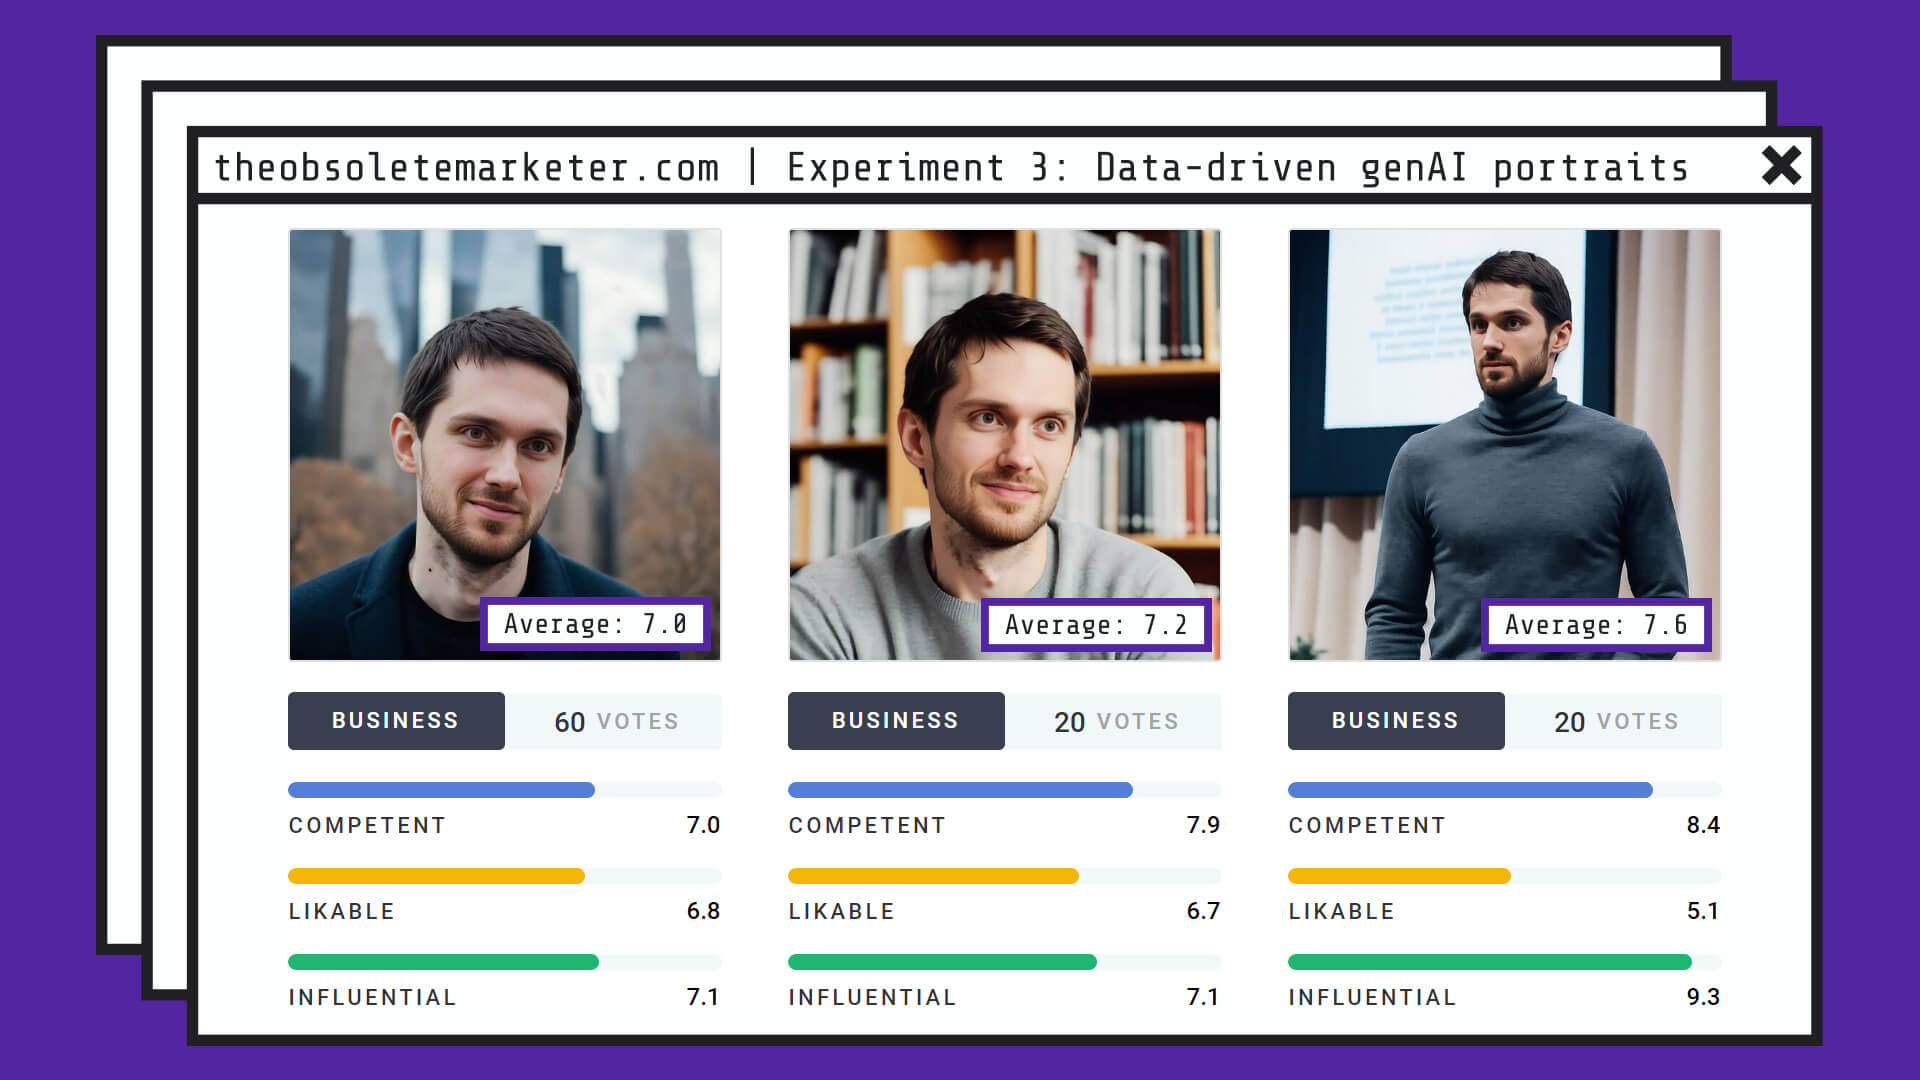
How did the generated portraits score?
Here are the top 3 generations:
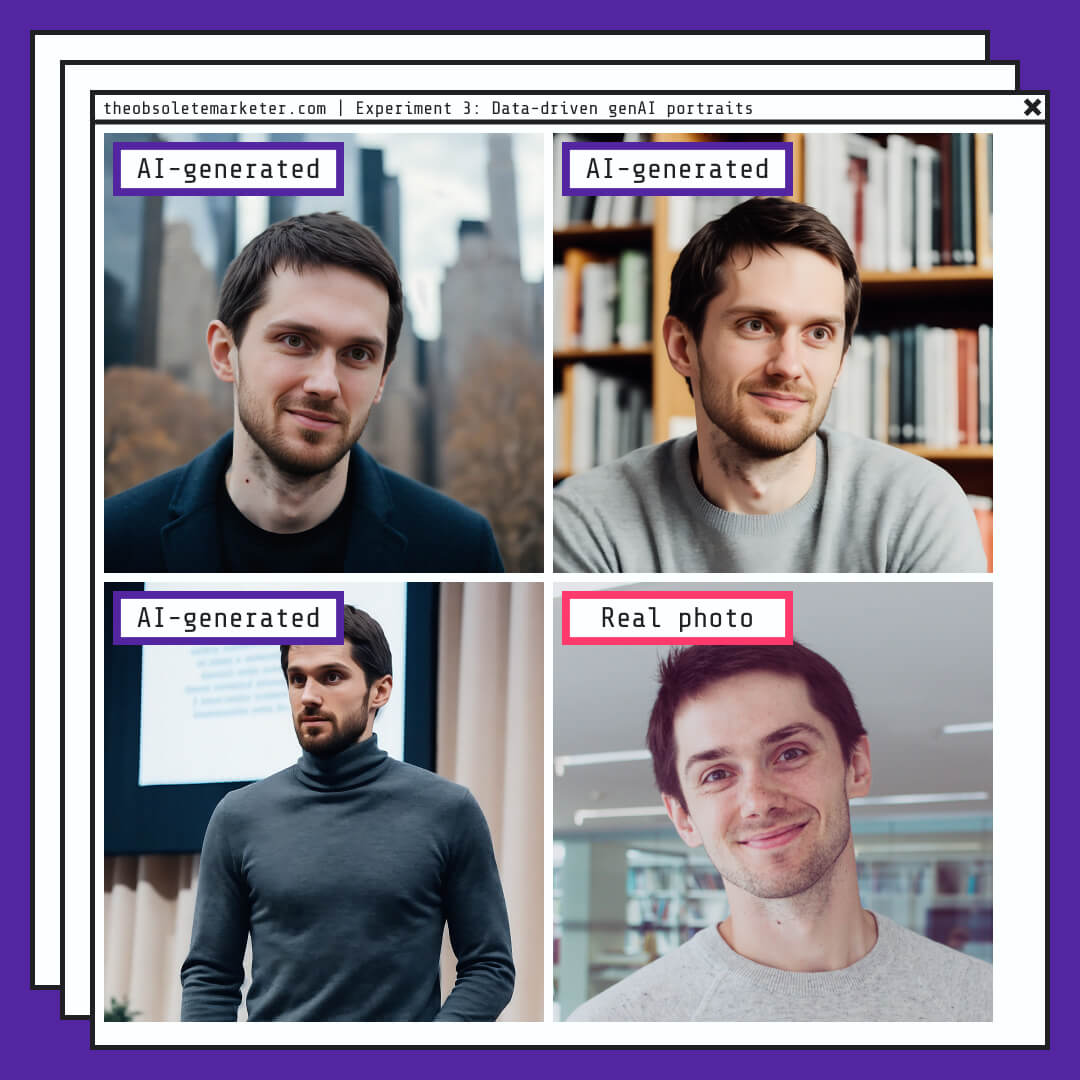
I then put them up for a test on photofeeler and immediately learned a few things:
-
None of them beat the original
-
My hypothesis seems to mostly be true
-
You can also achieve an improvement by replacing the background
One last try
As you’ve figured by now, the experiment didn’t reach its initial goal of generating something that beats my current portrait picture.
But I wasn’t about to give up yet and went for one last push:
- Removed the background of my original photo
- Put myself in various environments based on the initial hypothesis
- Tested the new pictures on photofeeler
- And… failed to top the original again
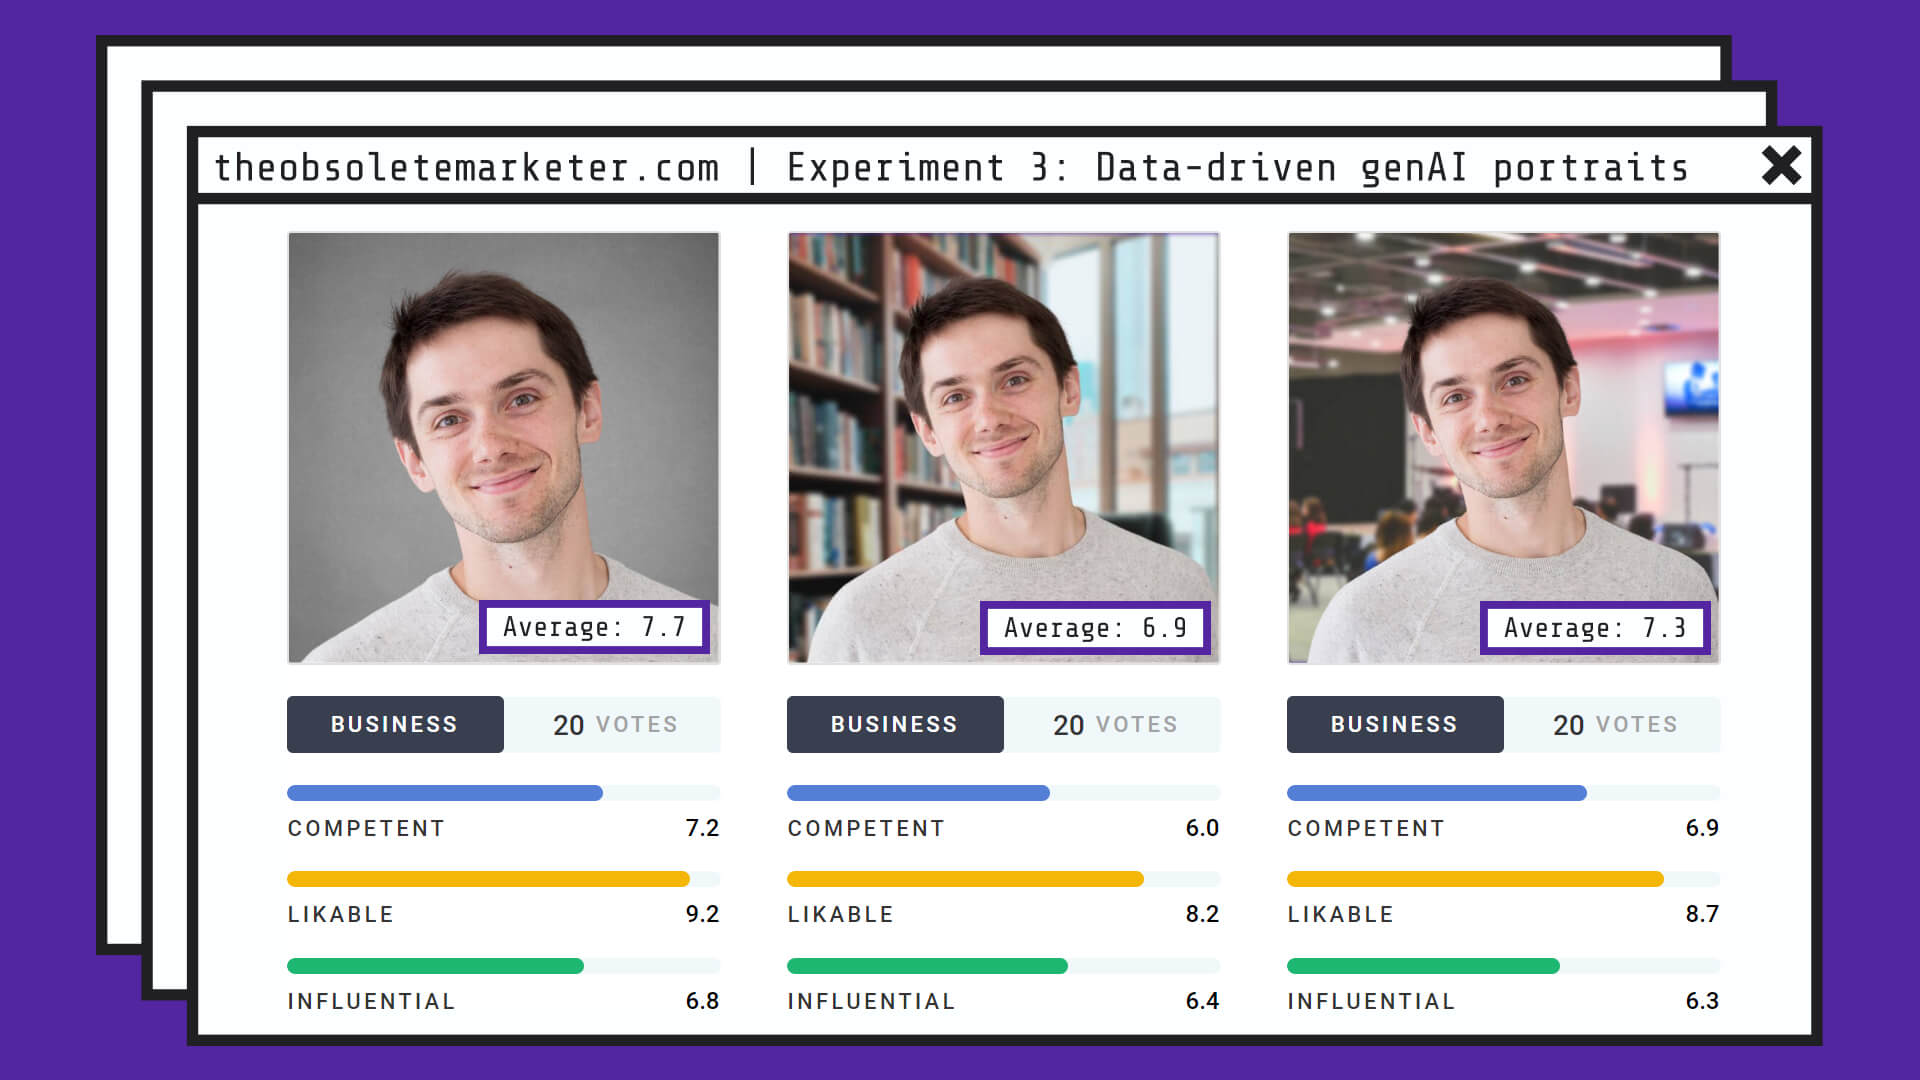
Although I found it interesting that the plain studio background photo scored best out of everything I’ve tried. Maybe the answer with colored flat background photos is to use a bit of a gradient to mimic studio backdrop?
Let’s give this the Performance Pirate Score
Ease of use 🟢🟢🟢🔴🔴
It’s easier than building something like this yourself or implementing an open source project to do it. But the tool itself has a learning curve to it if you want to achieve something specific.
There’s also the aspect of being able to train the model in a way that it actually resembles you enough.
Productivity 🟢🟢🟢🔴🔴
Finding photos to train the model on is not a trivial task, but also largely depends on how much you tend to be in photos as a person.
For a once in a while use like social portrait pictures I’d say it makes more sense to set a baseline, determine what you would like to achieve (plus the hypothesis of how), and arrange a photoshoot of yourself.
If you find a place with good lighting and follow a few basic composition rules, you can get 80% of the quality that a professional photographer would deliver.
Usefulness 🟢🟢🟢🟢🔴
Even if the approach requires some fiddling to train the model and get used to generating something meaningful with the tool, the approach still has significant benefits.
You can easily generate photos to test your hypothesis for a real photoshoot. If you’re in e-commerce and don’t need the likeness to be perfect – Photo AI recently added a feature to make the model wear specific pieces of clothing.
And you can of course use this for shit and giggles – portraying yourself in situations you typically wouldn’t be in. Hopefully for good reasons.
Obsolescence 🟢🟢🟢🔴🔴
It’s not yet at the level to leave portrait photographers without a job, but it won’t take long either. Various celebs are already replacing themselves with their digital counterparts {insert link}.
So achieving lookalike quality is possible, but still relies on expensive tech to do it well.
As with everything AI, the low cost professionals should be afraid because it’s easier to replace lower quality work. Top end photographers might be in trouble or have to niche down with the professional approach gaining steam.
Additional uses
From the product developments that Photo AI is currently having, it seems that Pieter (the creator) decided to focus on targeting e-commerce sellers.
It makes a lot of sense. For someone like me, with a personal use, it’s once in a year thing – I generate something usable and as long as I don’t look radically different from what’s in the photo I have no issue using that
In e-commerce you have a lot of products, e.g. apparel and can put it on these digital models creating lifelike pictures of your products instead of the bland lightbox stuff. The likeness of the model to somebody real is not as important.
I even wouldn’t be surprised if somebody managed to create a model of an influencer from publicly available photos and made that model wear whatever they’re selling. Not saying you should, but the ability to do so is real and it’s not hard at all.
That’s a wrap!
Overall, the tech is impressive, but not quite there yet.
If you can afford it, you would be better off to work with a portrait photographer based on insights that Photofeeler’s data gives you.
If you’d like to chat about how to apply this in the work you do – book a 30 minute call with me and let’s talk it through. No strings attached.
Bonus: generative AI portrait bloopers
Some pictures were decent, some horrible, but these – outright hilarious.